
Study the OTC body of knowledge in paired contrasts (cast versus splint, skin versus skeletal traction, each of the assessment signs versus its neighbors), then rehearse decisions in paper scenarios where you name the tempting wrong action, the better action, and the reason the distinction changes patient outcome.
Fracture descriptors: why displacement, angulation, and apposition are not interchangeable
Displacement describes how bone fragments sit relative to each other, angulation describes the angle of the distal fragment relative to the proximal one, and apposition describes how much fragment surface touches. Learn each term against the others, never alone.
The learning difficulty is that all three descriptors can be true of the same fracture at once, and each one drives a different clinical conversation. Apposition speaks to contact and healing potential; displacement speaks to fragment position; angulation speaks to alignment in a plane. When you study, force yourself to write all three descriptors for a single plain-film description, such as a transverse fracture with partial apposition and dorsal angulation.
Build the habit with paired flashcards: front side 'distal fragment tilted 20 degrees sideways' and back side 'angulation, lateral.' Then reverse it. The exam-style skill you are drilling is reading a description and producing the right term, plus hearing a term and picturing the geometry. Sketch each fragment picture from memory; if your sketch matches the words, the term is anchored rather than memorized.
- Apposition: percentage or degree of fragment-end contact
- Displacement: position shift of fragments relative to one another
- Angulation: direction and degree of distal-fragment tilt
Splint versus cast: matching the immobilization choice to the scenario
A splint is noncircumferential and tolerates swelling; a cast is circumferential and gives more rigid, longer-duration immobilization. In written scenarios, expected or active swelling points toward a splint, while stable, established injuries needing sustained rigidity point toward a cast.
The concept to internalize is that rigidity and accommodative capacity trade off against each other. A circumferential cast becomes a fixed tube; if the limb swells inside it, that tube does not expand. A splint leaves part of the circumference free, so it flexes with tissue change but controls motion less completely. Acute injuries seen shortly after trauma, injuries with anticipated swelling, and injuries needing frequent access are classic splint situations in study cases.
The realistic mistake in practice questions is choosing the more rigid option because it sounds more definitive. Train the reflex differently: read the scenario's timeline. Fresh injury, edema noted, or elevation ordered favors the splint; older, stable injury needing weeks of uninterrupted control favors the cast. Use the table below as a study anchor and recite the reason column from memory.
| Option | Scenario cue that favors it | Key care consideration | Watch-for in paper cases |
|---|---|---|---|
| Splint | Acute injury, expected swelling, need for access | Noncircumferential; wrap holds it, so check wrap tension | Scenario mentions edema or recent injury but offers a cast as a tempting answer |
| Cast | Stable injury needing weeks of rigid control | Circumferential; edges, padding, and swelling tolerance matter | Swelling complaints after application treated as routine instead of assessed |
| Bivalved or split cast | Existing cast with rising pain or swelling concern | Dividing or splitting relieves circumferential pressure | Documenting pain but leaving a rigid circumferential barrier in place |
| Traction | Need for alignment, distraction, or muscle-length control | Weights must hang free; system continuity is the point | Weights propped, resting on the floor, or removed 'just to reposition' |
Explore in 3D: Right Arm and Forearm Bones
Identify the three long bones of the right upper limb: the humerus in the arm, and the radius and ulna in the forearm. Learn their left-right relationship in anatomical position, which is a common exam question.
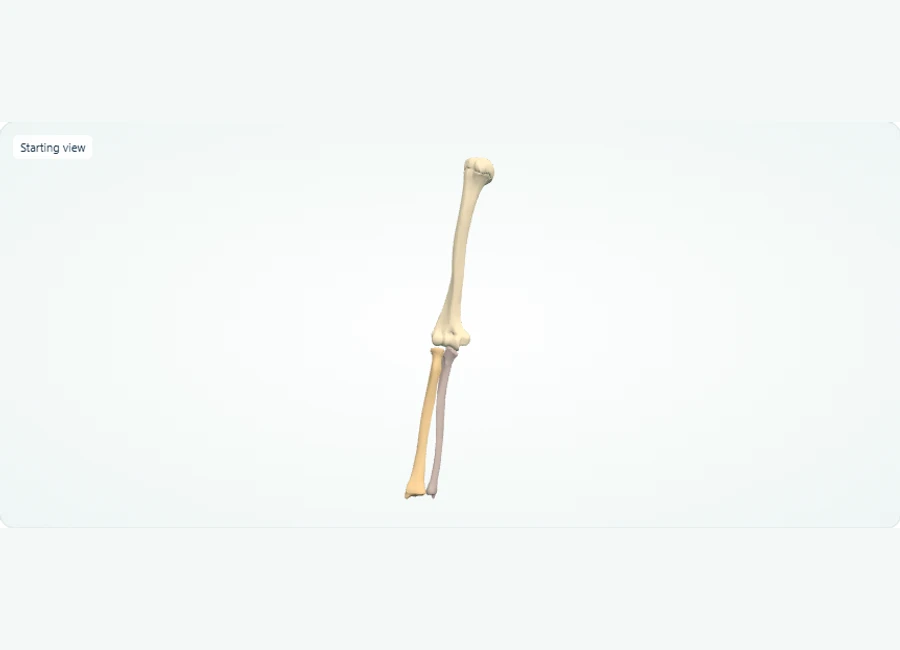
Rotate, isolate structures, and test your recall.
Drag to rotate the model to the front view and zoom in so all three bones are visible. Select the Right humerus to highlight the single arm bone; note it is the only bone between shoulder and elbow.
Isolate the Right radius, then show all and hide the radius to compare it with the Right ulna. In anatomical position, confirm the radius lies lateral (thumb side) and the ulna medial.
Use Test recall to hide the names and highlight a random bone. Guess its name, then Reveal name to check yourself, and Return to study to continue.
Try it yourself
In anatomical position, which forearm bone lies on the lateral (thumb) side of the right forearm?
Show answer and explanation
The radius
With palms facing forward in anatomical position, the radius sits laterally on the thumb side, while the ulna is medial on the little-finger side. Reversing this relationship is a common mistake, so test it on the model before your exam.
- The humerus is the single bone of the arm, spanning shoulder to elbow.
- The forearm has two bones: the radius and the ulna.
- In anatomical position the radius is lateral (thumb side) and the ulna is medial.
Explore in 3D: Right knee: bony relationships
A right knee shown as four whole bones — femur, tibia, fibula and patella — in anatomical position. This model teaches which bone sits where around the knee, not soft-tissue joint anatomy: no menisci, cartilage, cruciate ligaments or tendons are included.
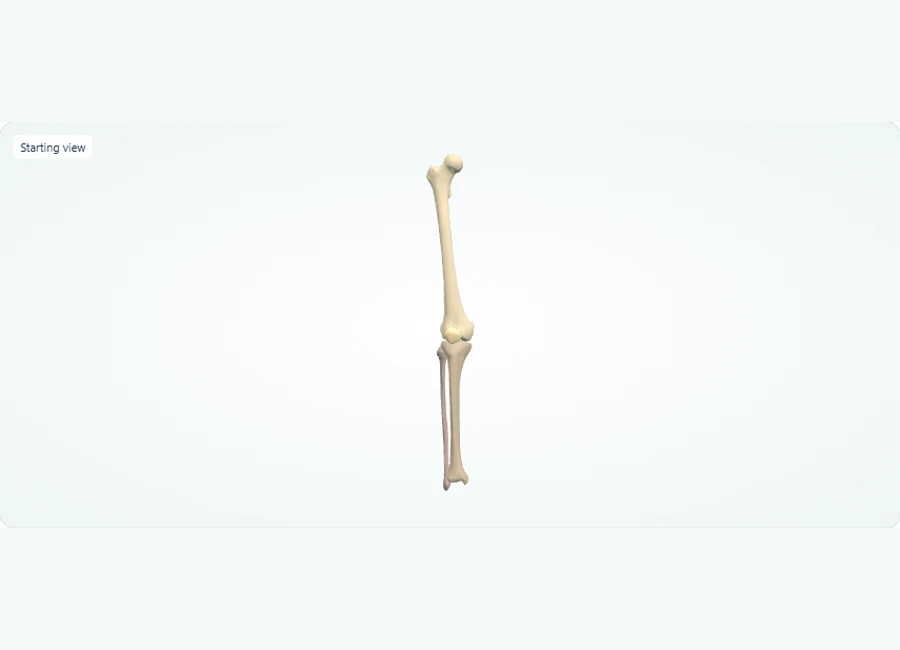
Rotate, isolate structures, and test your recall.
Compare Front, Back and Side views. Whole bones are included, so zoom and pan toward the knee region.
Select and isolate the patella to inspect it. Use Show all, then select and hide the patella to inspect the femur and tibia near the knee.
Use Show all and Test recall. Identify the highlighted bone, using the fibula’s lateral position and patella’s anterior position as clues.
Try it yourself
Which leg bone lies lateral to the tibia, and where is the patella relative to the knee?
Show answer and explanation
The fibula lies lateral to the tibia. The patella lies anterior to the knee.
In anatomical position, the fibula is the slender lateral leg bone, beside the larger tibia. The patella lies in front of the distal femur. These are bony relationships; the model does not include joint cartilage, menisci or ligaments.
- In anatomical position the fibula is the lateral bone of the leg, so it is your orientation landmark for left/right.
- The patella lies anterior to the femur–tibia articulation, so it appears at the front in a front view and overlaps the distal femur in profile.
- The knee region contains four bones here: femur above, tibia and fibula below, patella in front; joint soft tissues are not part of this model.
Neurovascular assessment: running the signs in a fixed, documented order
Distal assessment after immobilization follows a fixed checklist: perfusion, sensation, movement, and pain behavior, each compared with the other limb. The disciplined skill is performing and charting them in the same order every time, so omissions become visible.
Two ideas separate the reliable assessor from the casual one. First, every finding is compared bilaterally: cool fingers mean little until you have felt the other hand. Second, sensation and motor function are tested at the nerve level relevant to the injury, for example median distribution in the thumb and index for a distal forearm problem, not just 'fingers move' as one undifferentiated statement.
Drill this as a spoken script. On paper cases, write your findings in one consistent sequence: color and temperature, capillary refill, pulse quality, sensation by distribution, active motion, pain description including response to passive stretch. The realistic documentation mistake is charting only what is abnormal; the better habit is charting the baseline you obtained, because a later change in refill or sensation only means something against your own recorded starting point.
Skin versus skeletal traction: what changes for the technologist
Skin traction applies force through wraps or boots on the skin and is limited by skin tolerance; skeletal traction applies force through a pin placed in bone and permits stronger, longer-duration pull. The technologist's care concerns differ sharply between them.
With skin traction, the tissue you are protecting is the skin under and around the wrap: check for shearing, pressure over bony points, and whether the wrap has slipped. With skeletal traction, the pin site becomes the focus: observe for drainage, redness, and loosening, and handle the pin per facility protocol rather than improvising. Mixing the two care plans is a realistic study-case trap.
The second contrast is the weight system. In both forms, weights must hang free and the pull must stay continuous; that is the mechanical point of traction. A plausible case mistake is tilting the bed, removing weights, or letting weights rest on the floor to make a patient comfortable for a moment. The better written answer preserves alignment and free-hanging weights and solves comfort some other way, because an interrupted pull defeats the treatment itself.
Worked scenario one: rising pain after a short-arm cast, and the tempting routine answer
A freshly cast patient reports increasing pain unrelieved by elevation, with pain on passive finger extension. The tempting action is routine documentation and a scheduled follow-up; the better action is prompt escalation and pressure relief, because the pattern described is the concern itself.
Walk the case. A patient is placed in a short-arm cast the same day as injury. Hours later she reports pain that is worsening, feels deeper than the injury, and does not ease when the arm is elevated. Passive extension of her fingers hurts. The plausible mistake is charting 'patient reports pain, instructed to elevate, will review at routine visit.' That answer treats a time-sensitive pattern as a comfort issue.
The better written decision pairs two observations that matter together: pain that is rising rather than settling, and pain with passive stretch of the muscles involved. Together they justify immediate notification of the prescriber and relief of the circumferential constraint, such as splitting or bivalving the cast per protocol, while continuing to monitor distal perfusion, sensation, and movement. Why it matters: a rigid circumferential cast does not expand, so rising pressure inside it has nowhere to go, and the intervention is only useful while tissue is still viable. On paper exams, the timeline of the complaint is the signal; read it before choosing.
Worked scenario two: Buck's traction and the 'just move him up' impulse
A patient in Buck's skin traction slides down in bed and asks to be moved up. The tempting action is briefly lifting the weights out of the way; the better action keeps the pull continuous and free-hanging and uses body mechanics and assistance to reposition without interrupting traction.
Walk the case. A patient with a proximal femur fracture waits for surgery in Buck's traction, a form of skin traction with a boot and weights over the end of the bed. He slides down and asks to be pulled up. The plausible mistake is unhooking or propping the weights for a moment because they are 'only being moved a little,' or letting weights rest on the floor during repositioning.
The better written response preserves the system: request assistance, support the limb to maintain alignment, reposition with the weights still hanging free, and confirm the rope stays in its grooves and the boot has not slipped afterward. Why it matters: the traction force is the entire therapy at that moment, and skin traction adds a second stake, because a dropped or shifted system can shear the skin the wrap grips. This scenario trains a general principle that transfers to any exam item about traction: whenever comfort and continuity of pull conflict on paper, continuity is the answer, and comfort is solved around it.
A two-week contrast-and-scenario cycle, with a self-check rubric and readiness checks
Spend the first week pairing confusable concepts and sketching them; spend the second week on timed paper scenarios and documentation order. Finish by checking yourself against the rubric below, treating scores as learning milestones only.
Week one, pair and sketch. Each day, take one contrast pair: splint versus cast, skin versus skeletal traction, displacement versus angulation, bivalve versus window, each assessment sign versus its neighbor. Write the paired terms, sketch the geometry or the setup, and say the reason column of the table above from memory. Week two, scenario cycling. Take timed practice items, and for every item write a one-line answer to three questions: what was the tempting choice, what was the better choice, and which single case detail changed the answer.
Practical exercise: on three consecutive days, run a ten-minute drill in which you write a full neurovascular documentation sequence for two paper cases without notes, then describe-aloud the care differences between a cast complaint and a traction complaint. Expected observations by day three: you can list the assessment order without prompts, and your written rationale names a specific case detail rather than a generic principle. Score yourself with the rubric below and repeat any row scoring under three of five.
- Rubric item 1: named all neurovascular signs in fixed order from memory (target: complete, no notes)
- Rubric item 2: correctly assigned at least four of five scenario items to splint, cast, split cast, or traction, citing the deciding cue (target: 4/5)
- Rubric item 3: for each missed item, wrote the tempting choice, the better choice, and the distinguishing detail (target: all three lines written)
- Rubric item 4: documentation drill finished in ten minutes with bilaterally compared findings recorded (target: on time, baseline charted)
- Readiness check A: you can explain why a circumferential cast changes the response to rising pain
- Readiness check B: you can state, without notes, what must stay true of traction weights and why
- Readiness check C: your scenario rationales always reference a case detail, never only a memorized rule
References and further reading
Use these references to explore the concepts and check the latest information from the relevant organizations.